Sunday, November 9, 2014

Our First Open House

To view the latest from Ridge Berry Farm visit our new blog and site!

This week was a very busy one for us. For the first time in a while, it had nothing to do with farm chores, but rather our first open house. With hundreds of visitors, this turned out to be a rather successful event we are likely to repeat next year.

Tristan traded in his tractor for the BBQ, serving fresh sausages with some of our very own sauerkraut.

A farmer tuned cook.

Vendors were displaying their wares for Christmas, including our own gift baskets.

The transformed Tea Room was operating at capacity.
Native artist and spirit reader, Leona Skye was kept rather busy.
The most popular aspect of the three day event however turned out to be our house tour which was carried out to raise funds for the Welland Historical Museum. The tour focused on the history of the property and the two rooms allocated to our art glass gallery, where we focused on our Art Nouveau and Art Deco collections.

Explaining the architecture of our new home
We were overwhelmed during some of the touring sessions
Sharing our passion for art glass and the history of the old Victorian manor
Although we are still recovering from what became a very busy three days, we're already planning our next event: a Christmas Champagne High Tea to be held on December 6. Anyone interested should certainly call and book ahead of time!

Sunday, November 2, 2014

Back to Trellising Kiwis

To view the latest from Ridge Berry Farm visit our new blog and site!

When we first arrived at the farm in 2012, we knew we had some Kiwis growing on a small patch of our land. Having not been pruned for years, these had gone "feral" mixing with Wild Rose bushes, Wild Grapes and a variety of saplings, from Sumac to Mulberry.

Almost 2 years ago now we decided to attempt to tame these plants and enjoy their fruits. We experimented with pruning and trellises. We effectively tackled two rows of plants with about a dozen rows having been identified in the brush.

With two growing seasons under our belts, we now have a better handle on what we did right and what could have been improved. So this year we decided to at least free up another two rows... if not more. So along with our other tasks on the farm, we have been dedicating every morning to the Kiwis.

The objective is to have clean rows of trellised and pruned Kiwis from what is now effectively thick bush.

The objective is to get this.....

....from this!
The most tedious task is to free the Kiwi vines from the other feral plants, as well as from themselves. The Kiwi vines will grow upwards of 15 feet per year and will rapidly create an entangled mess.

Based on our past experience, we've learned that the best way to tackle this mess is to start from the bottom. It's almost like giving a hair cut to something that looks like Cousin It! We were somewhat shy to do too much cutting the first year; we now know that we can be quite aggressive with these plants. In fact, once on trellises, the vines can be pruned twice a year.

Based on out first row of trellises we've also learned that bringing a "bush" down to two mature vines will ensure fruit production for the following year. Since our trellises run from North to South, we send one vine North and the other South on one of our lines.

How we prune this mess has also come down to an art. There is very little and next to no information on how to prune "feral" Kiwis. So we have developed our own method.

We cut back each vine in a piecemeal manner, working our way up the vine and cutting at each junction. The objective is to get a healthy vine with at least two years of growth that has its start close to the original "trunk".

Working our way to two vines.
The whole process is daunting at first. In fact it can be quite confusing. What is important to note is that the diameter of the vine is not at all indicative of the age of the vine. Some vines will start to be one size and eventually split with a larger diameter the following year.

The most important thing to note is the colour of the wood. New vines will be light brown. In subsequent years, they will turn dark brown then grey. The much older portion of the vine will look dead with the outer bark flaking away. You should not be fooled by this as they will be very much alive. The vines that are actually dead will pull away easily like any other dead wood.

Colour differences with the age of the vine
What looks dead is actually very much alive
The reason we are paying a lot of attention to the age of the vines we prune is to ensure fruit production once we're done. Kiwi flowers and their fruits will occur on third year growth; this correlates to vines that have just become grey.

The final objective: two vines with 3 years of growth, starting close to the main root.

It's easy to see that this clean up of the vines is the most time consuming part of the process. The next step is rather easy: building and setting up the trellises.

Here again, we've learned a few things from our past experience. First, horizontal trellises work very well. They allow you to tame the growth of the vines while making Kiwi fruits easier to find and to harvest.

In fact, while clearing our first row this year, we discovered a lot of fruit still ripening. We would never have been able to find them in their current state. This time of year, the fruits are slightly wrinkled and really at their best (they make for a great sweet snack while working on them).

They wont last much longer, but the Kiwis are at their best this time of year.
When it comes to the trellises, we've adopted pretty much the same methods we used in our first attempt. We start with 10 ft. 4x4 wood posts and 5 ft. 2x4 cross bars.

We found that the best way to mount the cross bars on the main post is to cut the 4x4 down 2 inches and to chisel away the width of the 2x4 (creating an L-shaped groove).

Chiseling away the end of a 4x4 post
We then prepare to mount the cross bars by drilling together the 4x4 and the 2x4 with two holes, one for a 3/8" mounting bolt and the other a 1/8" guide hole for a cable. both are 1" from the edge of the cross bar.

Drilling away at the guiding wholes for both center cable and mounting bolt
We are not very accurate in this process and we really do not need to be. Once the holes are drilled, the cross bar and post are permanently matched.

The last step to prepare our trellis is to drill the other cable guide holes in the cross bar. These are one foot apart and in the center of the bar, resulting in a total of 5 cable holes.  

It's now time to install the trellis. Technically the posts should be 15 feet apart and so should the vines. We basically have to make due with what has been planted. Although the rows seem to be 15 feet apart, this is definitely not the case between the vines of each row. We have some that are much closer together; we also have some rows with gaping holes.

Since we are not prepared to uproot a well established vine, we've decided to work around this when positioning our trellises. We've also discovered a significant amount of new vines. It seems that the Kiwis have self propagated in many places. They do this almost like a Grape vine would. This provides us with new vines to transplant where we have gaps in our rows.

Small field of new growth ready for transplant
To install the post, we use an auger and drill roughly 3 feet. We are quite lucky to have sandy soil devoid of rocks. It is still however a pretty arduous task.

Drilling a post hole
The depth of the hole ensures that our posts will be 7 feet above the ground. The exact height is again not that important. Our plot of land is not level. The Kiwi plot is a hilly outpost nestled between a creek and our "beaver pond". Since the cables we use are easy to work with, we can accommodate the variations in grade.

The posts are simply dropped into the hole and back-filled with sand. We find that they hold quite well based on our first installation.

The last step is to mount the cross bars and install the cabling. The cables we use are made of a Polyamide resin. We find this to be much easier to work with than metal. In fact, we've adopted this material for all of our trellising needs around the farm.  It maintains tension very well, regardless of temperature and it is very easy to install.

To obtain tension on the lines, we did change a few things. First, we drilled our end post 1 foot below the top to install an eye bolt. On the ground, we installed a 24 inch trellis anchor at a distance equivalent to the height of the eye bolt (giving us a 45 degree angle on the main tension cable). We used standard trellis gripples and tensioning cables to complete the installation at the two end posts.

End post tension cable
In order to tension the Polyamide cables on the cross bars, our first installations used a wire vice grip. These had to be installed on the end post cross bars with specially drilled holes and proved to be not entirely reliable.

Original vice grip installation
This year, we decided to adopt a cheaper, easier concept: simple tension gripples. Perhaps not as "neat", using these small devices provides a lot more flexibility at almost half the price.

New end post tensioning gripples
Although we are now facing huge piles of cuttings, the end result is something we can be proud of. We know next year that these Kiwi vines will not only provide fruits but that these will also be accessible.

One cleaned out row leaves a mess of cuttings
We'll close this week's blog entry with a quick update on our Growing Dome.

The weather has turned cold and of course we've already had our first snow fall. In the dome, we're actually still harvesting heirloom tomatoes and some plants are still flowering. The Kale is also doing rather well. We're now thinking of planting some cold weather crops to see how they will do over the coming months.

Still producing Tomatoes in our unheated greenhouse dome

Monday, October 27, 2014

Birch Syrup and Whiskey BBQ Sauce

To view the latest from Ridge Berry Farm visit our new blog and site!

As we're coming close to the end of the calendar year, we found that we have very little Birch syrup left from our Spring tapping. Although we have sold quite a bit, very few people actually know what to do with it.

Earlier this year, our Chef had cured some char with Birch syrup and coffee grounds. However, until now, we've not really had much chance to experiment further.

Among other things this week, we decided to make a BBQ sauce with some of our Birch syrup. We were inspired by a Yukon recipe. We're so impressed with the results, we felt this had to be the topic of our post.

The three essential ingredients to our sauce are: Birch syrup, our own Tomato relish (the recipe was covered in previous blog entries), and good old Canadian Whiskey.

Three essential ingredients: Canadian Whiskey, Ridge Berry Birch Syrup and Tomato relish
The recipe consists of:

250 ml Birch Syrup (one  bottle)
280 ml Tomato relish (one jar) - note: Ketchup could be used
250 ml Whiskey - reduced to half by boiling
150 ml Grape seed oil
4 Tsp Dijon mustard
4 Tsp Cider vinegar

The whole thing was simply put in a blender and the result was impressive, a golden brown sauce.

Birch syrup and Whiskey BBQ sauce
We had to try it on some great cuts of Canadian beef and the new BBQ we have now installed in the manor's new courtyard. For this, we marinated our steaks for no more than an hour.


Putting the new BBQ and courtyard to the test
The result was simply superb, thumbs up from everyone. In fact, this was probably the best steaks we've ever had (and we've been to a lot of steak houses over the years). The sauce maintained the juiciness of the meat. The taste was a wonderful BBQ flavour of sweet and sour. However what tied it all together was the flavour of the smokey, woody Birch syrup. We will definitely be doing this again ...and again over the years.

Aside from our farm work, we've also actually been getting ready for the Holiday season. In the background, we've been processing our own liqueurs; what we call the Ridge Berry Cassis, Framboise and Anise. This work actually started over 3 months ago when we were picking fresh berries from the field.

We jarred some of the berries and just covered them with a strong alcohol (Grapa is good but Vodka can be used just as well). After 3 months, the alcohol has been infused with the colour and taste of the berries. We filtered the berries and added half an amount of sugar for every amount of liquid. Over time, the sugar is diluted into the alcohol.

This week, it was time for us to bottle the results.

Our very own Ridge Berry Anise, Cassis and Framboise
What we now call the Ridge Berry Framboise and Cassis are liqueurs of Purple Raspberry and Black Currants. They are great as an after dinner digestif or even as a complement drizzled over sorbets.

The Anise was produced with our very own Fennel and some additional spices. The result is a licorice-like taste very reminiscent of the Pastis which is often served in the south of France. It will be amazing over ice during the Summer months.

Over the past couple of years, this city family has come to adapt rather well to the farm. We've also been rather surprised at some pretty mundane things. Earlier this year, we discovered that Potatoes had fruits. As some of our plants now go to seed this Fall, we were actually amazed to see how cauliflower actually flowers! It's a really beautiful plant.

So this week, for the city folks, we'll close with a picture of a flowering Cauliflower.

Flowering Cauliflower

Sunday, October 19, 2014

The Sunchoke

To view the latest from Ridge Berry Farm visit our new blog and site!

When we first arrived at the farm, we were determined to grow some Jerusalem Artichokes. We knew them as a delicacy which was rather hard to find in the city, but that was about it. Never did we realize that this was a native plant.

In fact, the Jerusalem Artichoke is also known as the Sunchoke and basically has nothing to do with the Middle East. It is a poor translation of the Italian "Girasole Articiocco" which translates to Sunflower Artichoke.

At first, we tried to get roots of this pant via the Internet. For some reason every site promoting this plant seemed to be out of stock. As a result, we were quite pleased to get some last Fall from a local patron. After learning how well they grow here and doing some research, we ended up seeing this native plant just about everywhere in Niagara. It grows wild on the side roads throughout the country side.

Our first batch of Sunchokes ready for planting
We decided to let Chef have his try with some of the roots and he produced a wonderful cream soup. We then decided to dedicate a raised bed to this amazing plant. The problem is come Spring time, we completely forgot which bed we used and could not find the roots.

Luckily, we also discovered this plant in the back of the old manor. As we were preparing to landscape this year, we decided to take those roots and appoint a special raised bed just for them.

It did not take long for us to find the "lost" roots we had planted the previous Fall. The bed was planted with Squash and the Sunchokes completely and effectively took over the entire space, destroying our Squash vines in the process. So we now have two beds filled to the rims.

The Sunchoke is a species of Sunflower and a beautiful one at that. It will grow well over 6 feet and will carry beautiful yellow daisy-like flowers into the Fall. The stems are thick and very strong.

Blooming Sunchokes
Since some of these plants have already gone to seed and since it is now time to clean some of our raised beds for next year's planting, we decided to tackle the harvesting of some Sunchokes as well as prepare them for the late Fall and Winter months. In fact, with the strong winds coming over the ridge some of these very tall plants are starting to fall over. Their root structure is not very deep.


Sunchokes going to seed
The edible delicacy of the Suchoke is in those roots or tubers of the plant. In fact, they are prolific "multipliers". One tuber will easily generate another dozen in one growing season.

One tuber generates a significant amount of food in a growing season
Although a great and healthy food which was used by both aboriginal and settlers alike, there are a couple of issues associated with the Sunchoke. One of these is its short shelf life.

Once taken out of the ground, the roots will not last long and need to be kept in a cold and very humid environment. They tend to blacken and turn limp.

The best way to store the Sunchoke is basically to keep it in the ground. Since we intend to use this as a source of food this Fall and during the Winter, we prepared our beds by cutting the Sunchokes down to about 12 inches. This will prevent the plants from falling over in the wind, while we will always be able to find them even in the snow.

A Sunchoke bed ready for the Winter
 The Sunchoke root resembles the size and shape of Ginger. Its taste however is mildly sweet and very similar to its namesake the Artichoke. It can be processed very much in the same way as you would potatoes. However, it can also be eaten raw in salads where it has a flavour and consistency similar to that of Water Chestnuts. Because the skin of the Sunchoke tuber is rather thin, it does not necessarily need to be peeled to be enjoyed.

Our first roots we simply processed as we would roasted Potatoes. We brushed clean the Sunchoke roots, cut them into bite size pieces and roasted them with olive oil, Garlic and fresh Thyme.

Sunchokes ready for roasting
One note of caution, you do not want to overcook the roots. They do tend to become "mushy" when overdone.

This brings us to the second problem of the Sunchoke. They contain a lot of inulin.

Inulin is found in many plants and is a zero calorie polysaccharide. Inulin is used by the plant to store energy. It is zero calories simply because our bodies cannot digest it. The result is that it can cause flatulence.

Our bodies can adapt to inulin, but the best way to overcome this problem is to wait a little later in the year to harvest the roots. As the Fall progresses, the plant will be stressed by frost. The more frost it is subjected to, the more the plant will transform this inulin into sugars.

Earlier, we indicated that the best way to store the Sunchoke is in the ground. There is however the possibility to pickle and can Sunchokes. We decided to give this a try as well.

Our recipe is simple. We cut the roots into small (less than 1/2 inch) bite size pieces. We place these overnight in a brine consisting of lemon juice, water and salt. The ratios were 250 ml of lemon juice for 2 litres of water and 1/2 cup of Kosher salt. This prevents the roots from browning.

We then prepared a vinegar solution consisting of 6 cups of cider vinegar, 1 1/2 cup of white wine vinegar, and 1 cup of sugar. To this, we added 3 Tsp of mustard seeds, 2 Tsp of Turmeric, 2 Tsp of Chili fakes and 2 tsps of dry powdered mustard. We also added 3 large Bay leaves and 3 cloves. The whole thing was boiled and brought back down to room temperature.

We then simply canned our Sunchokes with this mixture.

Canned Sunchokes
The result is a great crunchy pickle which seems to be perfect as an accompaniment to Middle Eastern or North African dishes. It can also be used simply as a "munchy" with beer.

For us, the Sunchoke turns out to be a great compliment to our garden. It is a beautiful flowering plant; it is easy to grow and prolific (also requires no weeding); it is a healthy food (a good source of fibre and vitamins while being a great replacement to other high calorie starches); it is delicious and versatile.

We'll end this week with a couple of photos which summarize the progress in our growing dome. We're now able to harvest our first bell peppers and heirloom tomatoes!

Bell Peppers from the Growing Dome
Gorgeous Marizol Gold heirloom tomato


Sunday, October 12, 2014

Happy Thanksgiving!

To view the latest from Ridge Berry Farm visit our new blog and site!

It's already Thanksgiving for us in Canada and we wish all our Canadian readers a wonderful weekend with family and friends.

This week has provided us with beautiful sunny Fall weather and crisp cold nights, turning the foliage into a gorgeous spectacle of colours. However nothing says Thanksgiving like the corn, squashes and pumpkins coming from the local fields.

The local markets are loaded with the colourful harvests of Fall.

One of the best corn available in Pelham comes from Bry-Anne Farms. We may be a bit biased here since Bryan grows some of his corn on our property. However, it has to be the sweetest around and Bryan's philosophy is always to serve his corn as freshly picked as possible so that the sugars have had no opportunity to turn to starch.

Nothing like freshly picked corn!
So for us this week, it was an opportunity to start processing some corn for the upcoming Winter. For the most part we have been freezing it. we cut the kernels from the cobs, blanch them and store them in freezer bags.

This was also a chance to make our first corn relish. To do this we used 8 cups of corn kernels, 8 cups of diced red bell peppers and 4 cups of diced red onions. We simply browned the onions and peppers with 2 Tsp of Kosher salt and then added the corn to cook for another 3-4 minutes.

We added 3 cups of cider vinegar and 2 cups of sugar. We then brought everything to a boil. Spicing is up to taste, however we like to use Turmeric for this relish.

The relish can be thickened with corn starch to get just the right consistency.

Our first corn relish
Making corn relish and packing corn for the freezers generated a lot of cobs. By chance, we stumbled on another recipe  from a time when nothing was wasted: Corn Cob Jelly! We had to try this.

We boiled some of our corn cobs for 1/2 hour and simmered the strained water. For every amount of this water, we added a similar volume of sugar. For 2 qts of water, we also added 12 Tsp of lemon juice.

To set the jell, we added 4 Tsp of Apple Pectin.

The result is pleasantly surprising. The jelly is a beautiful translucent pale yellow and at first has the taste of sweet corn however, the finish on the palate is exactly like honey!

Corn Cob Jelly: quite a discovery!
Of course, it would not be Thanksgiving without pumpkin pie. This has been a big seller at the Tea Room and Chef has outdone herself this week by using the most beautiful pumpkins available to make the traditional pie, as well as a pumpkin maple pie, a pumpkin pecan pie and even a gluten-free pumpkin pie.

It's Pumpkin Pie season at the Tea Room.
 We'll end this week with an update on the manor's landscaping. It is all now coming into place and our home is looking less and less like a construction site now that some sod has been laid.

A stone bench on the ridge was created using some finds from the original barn flooring
The canine members of the family are also thrilled now that the courtyard in back of the house is finally completed. We now need to furnish this space but it will definitely be welcomed next Spring.

The courtyard is finally complete.


Sunday, October 5, 2014

Kiwis by the Bushel

To view the latest from Ridge Berry Farm visit our new blog and site!

It's Kiwi season in Pelham!

Our Kiwis are ready to pick and the trellised Kiwis have done very well for us. We have been calling our variety "Arctic Kiwis", however to be frank we're not exactly certain which variety we have. Our vines were planted years before our acquisition of the farm and it seems years before Kiwis were actually considered a viable crop for Niagara.

The "Kiwi" is actually a marketing name for what used to be called the Chinese Gooseberry and there are over a hundred varieties, from small to large, red to orange to green fruits.

Our type of Kiwi is small and blushes red when mature. They have a smooth skin and do not need to be peeled when eaten. We have seen similar Kiwis marketed as "Hardy Kiwis" or "Kiwi Berries".

Ripe and juicy "Arctic Kiwi"

Whatever variety we have on hand, our attempts at pruning and trellising have worked out well and we will now have to work on a dozen rows which have become "feral". They have self-propagated and entangled themselves in wild Grape vines, wild Rose bushes and the occasional Mulberry tree.

When properly trellised and pruned, the Kiwis are easy to harvest and form what we like to call "Kiwi coves". It's a rather beautiful site when walking under the trellised vines.

Trellised Kiwis ready to be picked
In fact some of our Kiwis have grown rather large.

A sample of large "Arctic Kiwis" or "Kiwi berries"
The major problem with these fruits is that they do not ripen at the same time. Also, the fruits that have had little exposure to the sun do not turn red. As a result, the only way to test for ripeness is to feel just how soft they are. The softer the better. Since this cannot be efficiently done when harvesting, we have been picking all Kiwis including unripened "hard" Kiwis. These we store in the barn until they soften for sale or further processing.

Harvesting Kiwis has proven to be one of our favourite Fall tasks
What we like to make with our Kiwis is a Kiwi jam which is sold at the Tea Room market.

Our first Kiwi jam of the season
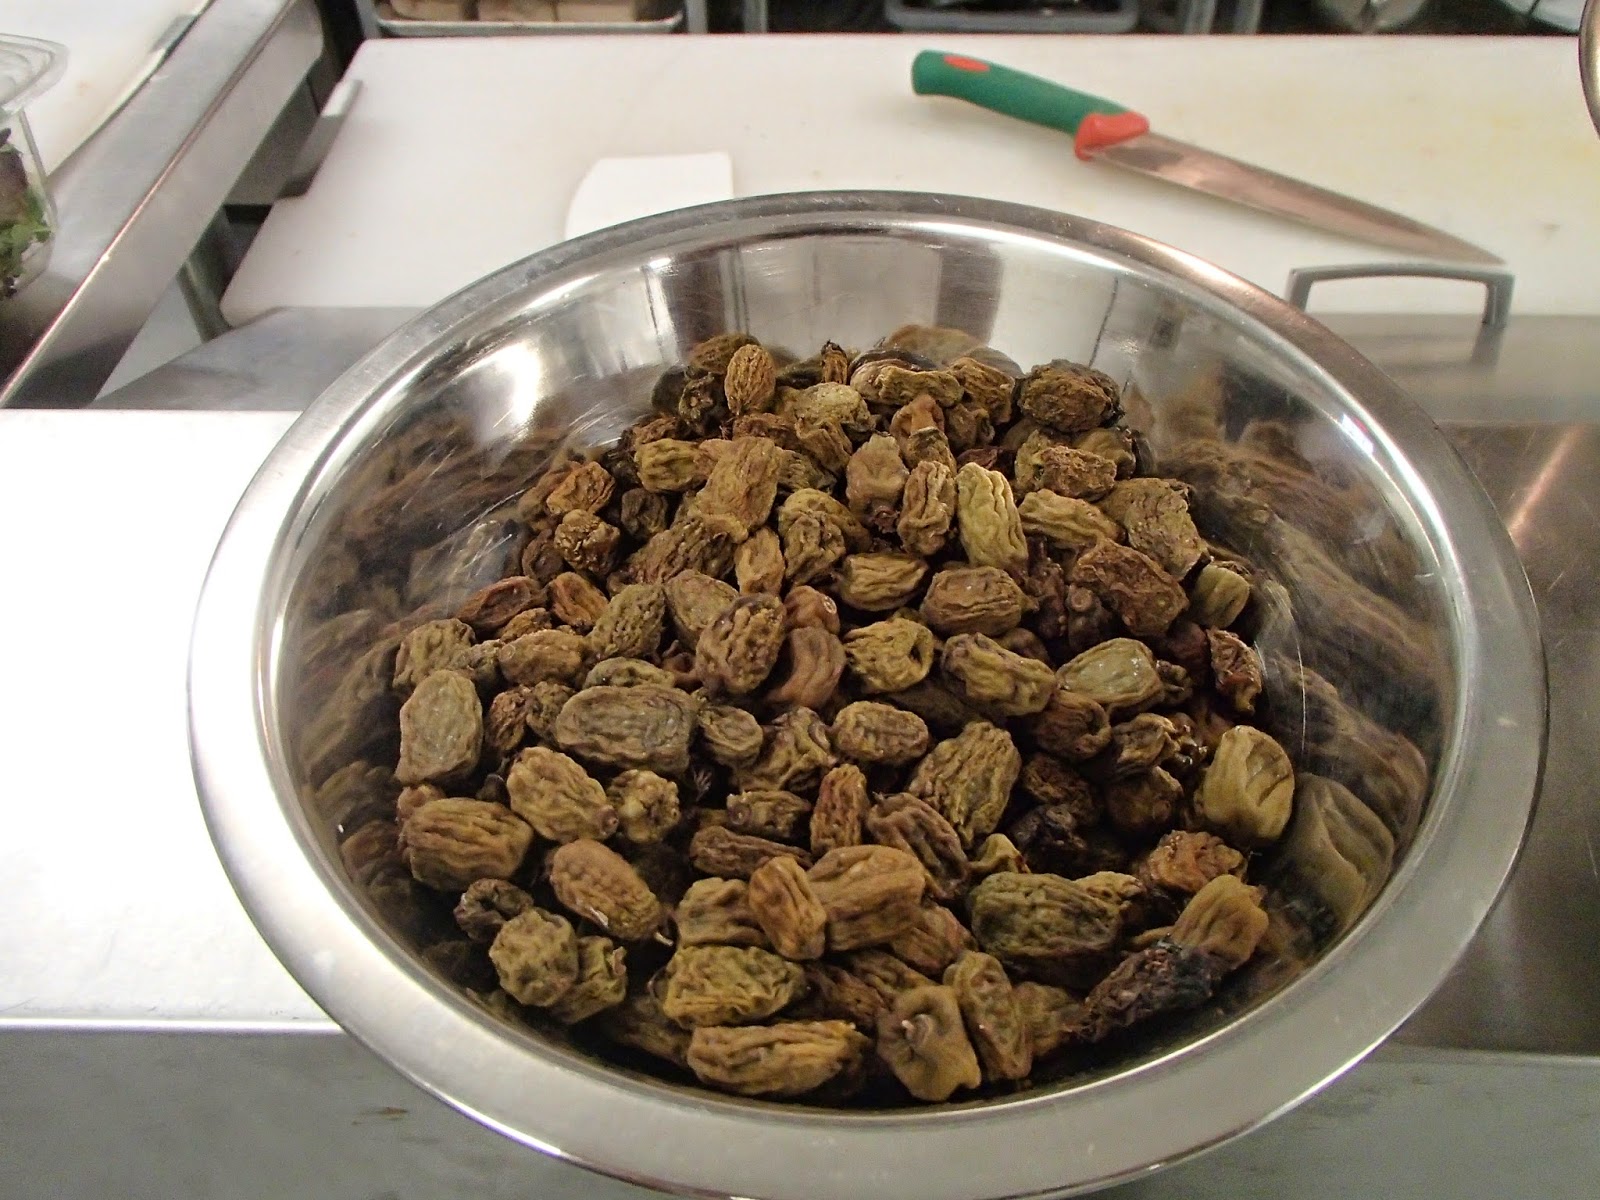
We also like to use the overly ripe fruits (those that would correspond to a late harvest grape) to make what we call Kiwi raisins. These we use in our Tea Room baked goods and we also sell at our market. It is difficult to describe the taste of a Kiwi raisin but they tend to resemble a cross between a conventional raisin and a fig, with a floral and exotic fruit aftertaste.

Kiwi raisins ready for baking
Our favourite use however is still our home made wine. Our Kiwi wine has the taste of a late harvest Chardonnay with an exotic fruit bouquet. This will definitely be our next project for the Autumn season.

On the foraging front, we have been harvesting Staghorn Sumac drupes. It is amazing to see how many people consider this a poisonous plant (confusing it with the Poison Sumac). The two plants are significantly different and cannot be mistaken. The Poison Sumac is not as common in Canada as it is in the South of the United States. It also has a whitish grey berry, nothing like the red and furry drupes of the Staghorn Sumac.

The Staghorn Sumac and its drupe
Since our arrival at the farm, we have been indulging in Sumac tea or what the settlers called "Indian Lemonade". The process for this is perhaps the simplest of recipes you can come up with.

We tend to pick our drupes in late Summer or early Fall (never after a rainfall since it tends to wash away the flavours). These we simply put in a pot, add cold water and let sit over night. The next step is to simply filter out the drupes. The result is a delicious golden red tea, ready to consume.

The simplest of recipes: steeping Sumac drupes in cold water

Depending on one's taste, the resulting tea can be made more concentrated by waiting longer or  by using smaller drupes (which provide more surface area for water to come into contacts with the small furry berries).

This plant was considered a medicinal plant by some aboriginal tribes. In fact it was sometimes dried and smoked with tobacco. Not only is the tea delicious, but it is also associated with a lot of health benefits, including a high concentration of antioxidants. Note that people highly allergic to poison ivy could be allergic to Staghorn Sumac as well.

This year, we decided to go a bit further and we've actually transformed a concentrated tea into a jelly. This jelly retains many of the properties of the Sumac tea and has a mild wood spice aftertaste.

Finally, another fruit to look out for this time of year is the Quince.

Today few people can recognize a Quince or know what to do with this odd pear-like fruit. In the area many "feral" trees can be found and the fruits are definitely worth harvesting.

Every year one of our neighbours tends to surprise us with a new find and this year he did not let us down by bringing in a bag of large and beautiful fruits (thank you John!).

Quinces ready to be turned into jelly.

Since we've not reported on the Ward Manor for quite a while, we'll close this week with a quick update. We're now nearing the end of the landscaping phase, The "hardscape" is almost done and for the first time we can now take a full picture of the old Victorian home.

The old manor in all its splendor
With the internal portion of the house completely refinished, the glass gallery has also hosted a few hundred  visitors this tourist season.

The gallery is open to the public by invitation or appointment
For our Tea Room open house (November 6-8), we will be working on a fundraiser for the Welland/Pelham Museum. Tickets will be sold to view the gallery as part of a tour of three heritage buildings. The tours, to be held on November 8th, will include a briefing on art glass from the Art Nouveau and Art Deco periods, a detailed briefing on the history of the property, as well as a presentation of the various "secrets" of the manor.